Many of the schema design patterns we’ve covered so far have stressed that saving time on JOIN operations is a benefit. Data that’s accessed together should be stored together and some data duplication is okay. A schema design pattern like Extended Reference is a good example. However, what if the data to be joined is hierarchical? For example, you would like to identify the reporting chain from an employee to the CEO? MongoDB provides the $graphLookup operator to navigate the data as graphs, and that could be one solution. However, if you need to do a lot of queries of this hierarchical data structure, you may want to apply the same rule of storing together data that is accessed together. This is where we can use the Tree Pattern.
The Tree Pattern
There are many ways to represent a tree in a legacy tabular database. The most common ones are for a node in the graph to list its parent and for a node to list its children. Both of these representations may require multiple access to build the chain of nodes.
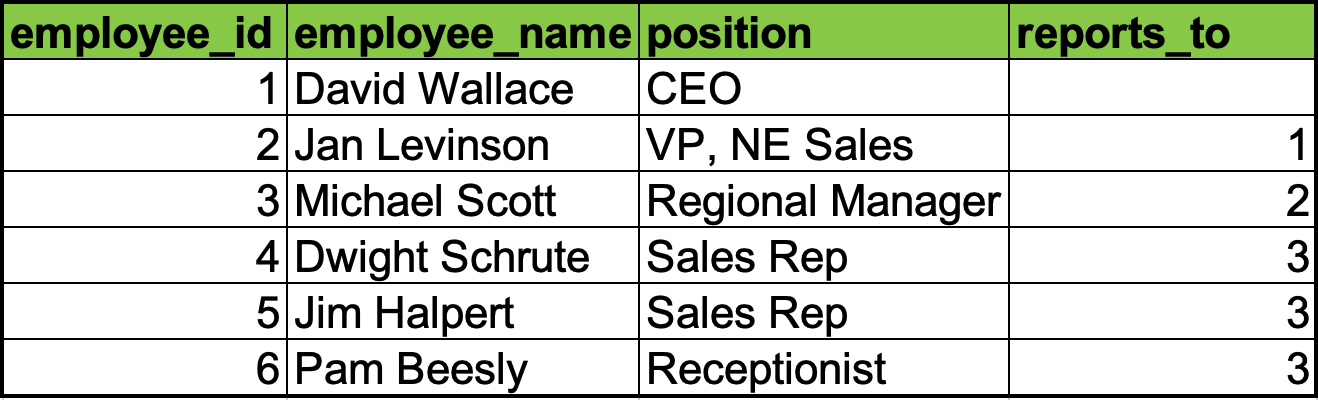
Corporate structure with Parent nodes
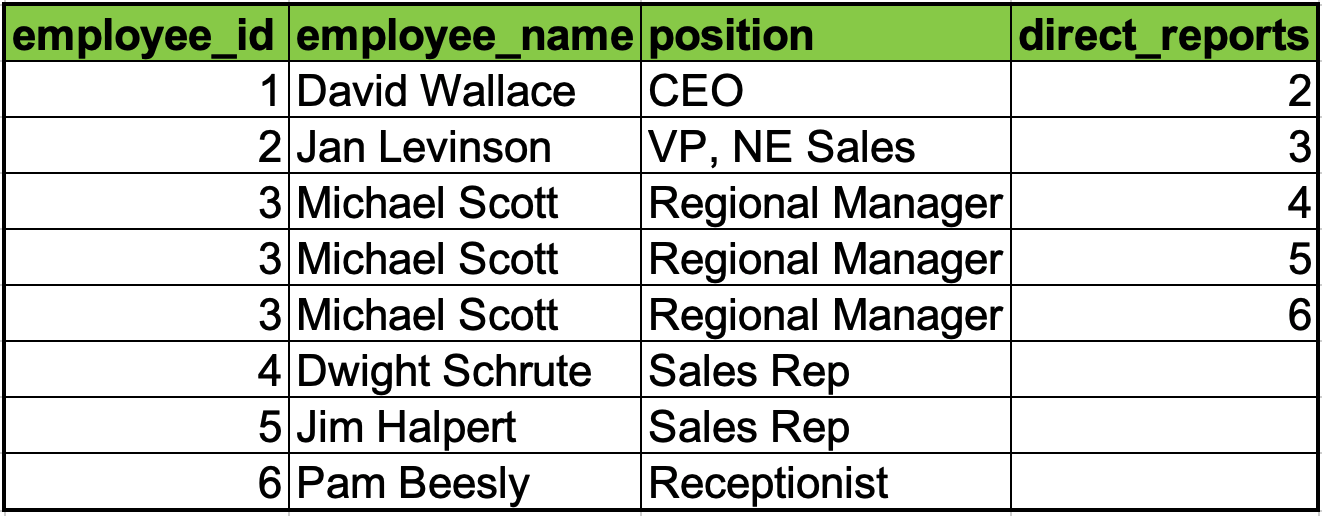
Corporate structure with Child nodes
Alternatively, we could store the full path from a node to the top of the hierarchy. In this case, we’d basically be storing the “parents” for each node. In a tabular database, it would likely be done by encoding a list of the parents. The approach in MongoDB is to simply represent this as an array.
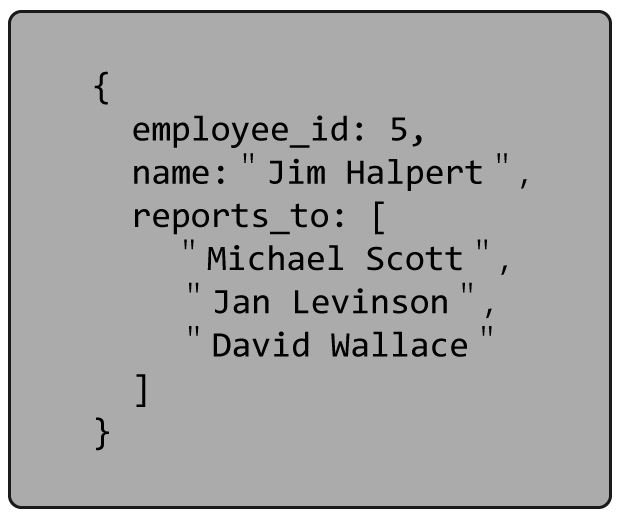
As can be seen here, in this representation there is some data duplication. If the information is relatively static, like in genealogy, your parents and ancestors won’t change making this array easy to manage. However, in our corporate structure example, when things change and there is restructuring, you will need to update the hierarchy as needed. This is still a small cost compared to the benefits you can gain from not calculating the trees all the time.
Sample Use Case
Product catalogs are another very good example of using the Tree pattern. Often products belong to categories, which are part of other categories. For example, a Solid State Drive may be under Hard Drives, which is under Storage, which is under Computer Parts. Occasionally the organization of the categories may change, but not too frequently.
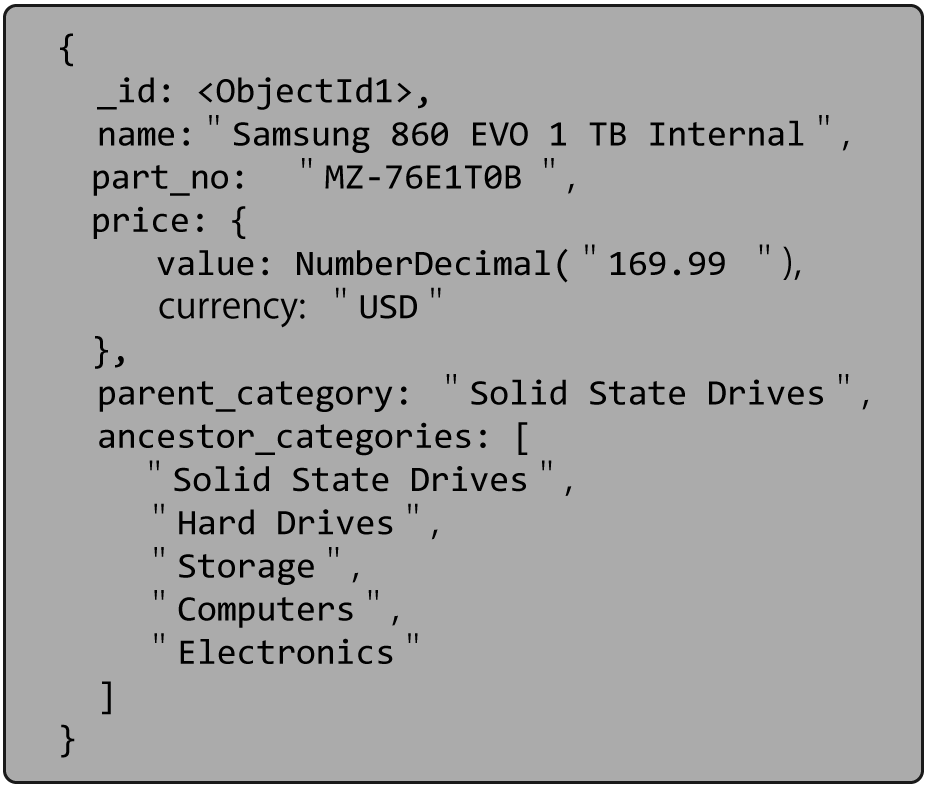
Note in the document above the ancestor_categories field which keeps track of the entire hierarchy. We also have the field parent_category. Duplicating the immediate parent in these two fields is a best practice we’ve developed after working with many customers using the Tree Pattern. Including the “parent” field is often handy, especially if you need to maintain the ability to use $graphLookup on your documents.
Keeping the ancestors in an array provides the ability to create a multi-key index on those values. It allows for all descendants of a given category to be easily found. As for the immediate children, they are accessible by looking at the documents that have our given category as its immediate “parent”. We just told you that this field would be handy.
Conclusion
As for many patterns, there is often a tradeoff between simplicity and performance when using them. In the case of the tree pattern, you get better performance by avoiding multiple joins, however, you will need to manage the updates to your graph.
The next post in this series will look at the Pre-Allocation Pattern.
If you have questions, please leave comments below.
Previous Parts of Building with Patterns:
- The Polymorphic pattern
- The Attribute pattern
- The Bucket pattern
- The Outlier pattern
- The Computed pattern
- The Subset pattern
- The Extended Reference pattern
- The Approximation pattern