Gone are the days when expectations of information were not instantaneous access to the data. In today’s world, people expect real-time results and information. What’s the moisture content of the soil around grapevine X right now? Not yesterday, not five minutes ago, but now. Being notified about constantly changing data points is critical in many of today’s applications. In the latest 3.6 release of MongoDB a new feature is being introduced to assist with these real-time expectations: Change Streams.
Change Streams Defined
Change streams are being implemented in the driver with a new aggregation operator, $changeStream and watch method in the API. We can now specify a $changeStream stage at the beginning of our pipeline and request that notifications are sent for specific changes to a particular collection.
Example Use Case
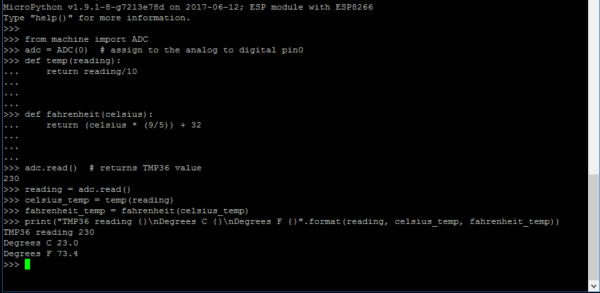
Let’s take the soil moisture example I stated earlier. Imagine that you have a farm with multiple moisture sensors or a TMP36 Analog temperature sensor
connected to something like a NodeMCU ESP8266
or LoPy
device. Without going into detail about how to set the IoT network up, for the sake of our use case we can assume that they are sending readings back to a MongoDB server. Perhaps the data is being stored on MongoDB Atlas even. I have, however, written about the LoPy microcontroller and ESP8266 with temperature sensors in the past if you are interested in learning more.
Anyway, for the sake of argument, let’s say that we need to know when the moisture content of the soil drops below a certain level. Moisture values on similar devices are measured as a raw number between 0-1024. The higher the number, the more moisture in the soil. For our use case, we need to know when the moisture level drops below 350 (too dry).
Change Stream in action
Since these recordings are frequently changing, we can set up a change stream to get notified. It’s fairly straightforward to establish a notification with the watch method. We could set something like this up:
change_stream = client.winery.collection.watch([
  {'$match': {
       'operationType': {'$in': ['insert']}
    }},
    {'$match': {
        'moisture_level': {'$lt': 350}
    }}
]);
for change in change_stream:
    turn_on_water();
    # Something else magical
Now when we have an insert into the database where the moisture_level is below 350, we’ll turn our watering system on along with whatever else needs to be done. We could set up a similar change stream for when the moisture level gets high enough to warrant shutting the system off at 450.
This is but one example of where change streams would be a useful tool. Updating reports dynamically on data changes, publish/subscribe types of functionality, brokers, and many other use cases are now open to native MongoDB actions.
Change Steam Details
You’ll notice that there is an operationType being looked at there. Change streams look at five different events, or Operation Types
- Insert
- Delete
- Replace (everything but the unique id)
- Update
- Invalidate (in cases of an invalid cursor being returned)
Change streams also utilize access controls and can be set up based on user roles. They present a defined API and enable scaling across primaries and secondaries. MongoDB is supporting up to 1,000 concurrent change streams per data bearing node in 3.6.
They are durable, meaning they rely on the data being majority committed in a replica set. The order of the changes in data is important too, right? 3.6 also introduces a global logical clock which, among other uses, will ensure that clients always will get changes in the order they occurred on the server. This is very important for replace and update operations.
Wrap Up
There are a lot more technical details about change streams forthcoming as 3.6 moves closer to production and documentation is further flushed out. Change streams are inherent in the 3.6 Server and are available in both the community and enterprise versions of the product. MongoDB Version 3.6 is available to download today as a release candidate. Which means that while the high-level concepts of change streams discussed here likely will remain in tack in the final release, there may be some subtle changes. That being said, change streams are a great feature being implemented in the new release. If your applications require or could use real-time information, I would encourage you to have a look.
Follow me on Twitter @kenwalger to get the latest updates on my postings.
There are a few MongoDB specific terms in this post. I created a MongoDB Dictionary skill for the Amazon Echo line of products. Check it out and you can say “Alexa, ask MongoDB for the definition of a document?” and get a helpful response.