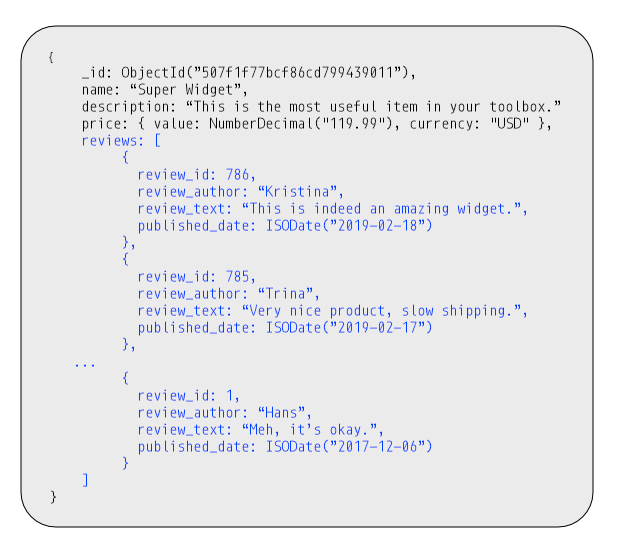
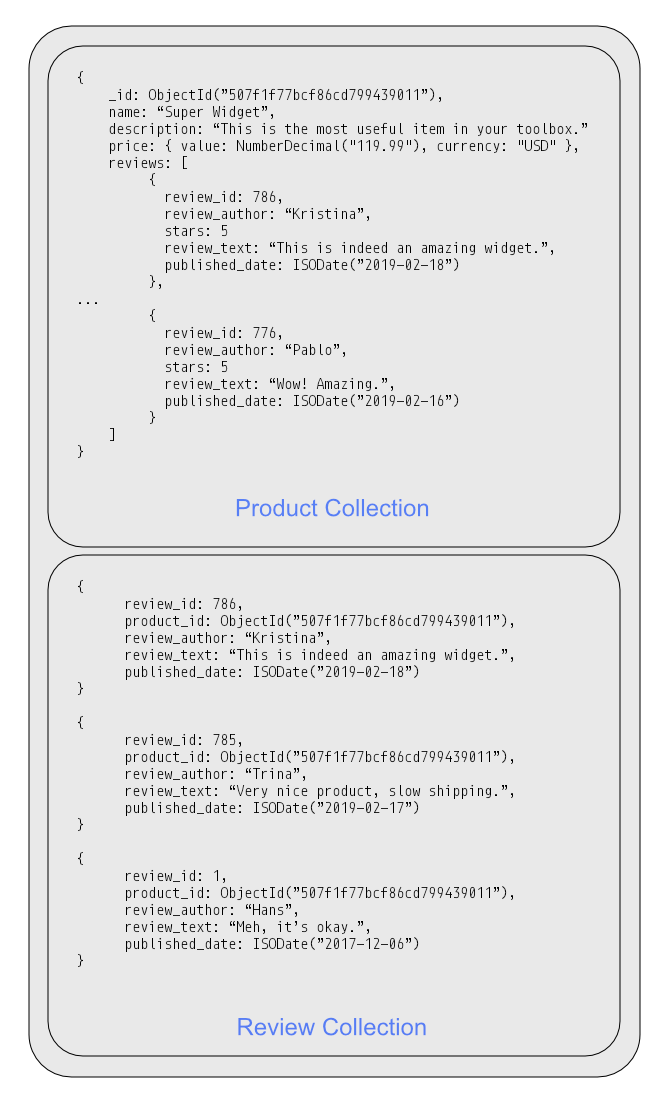
Throughout this Building With Patterns series, I hope you’ve discovered that a driving force in what your schema should look like, is what the data access patterns for that data are. If we have a number of similar fields, the Attribute Pattern may be a great choice. Does accommodating access to a small portion of our data vastly alter our application? Perhaps the Outlier Pattern is something to consider. Some patterns, such as the Subset Pattern, reference additional collections and rely on JOIN operations to bring every piece of data back together. What about instances when there are lots of JOIN operations needed to bring together frequently accessed data? This is where we can use the Extended Reference pattern.
The Extended Reference Pattern
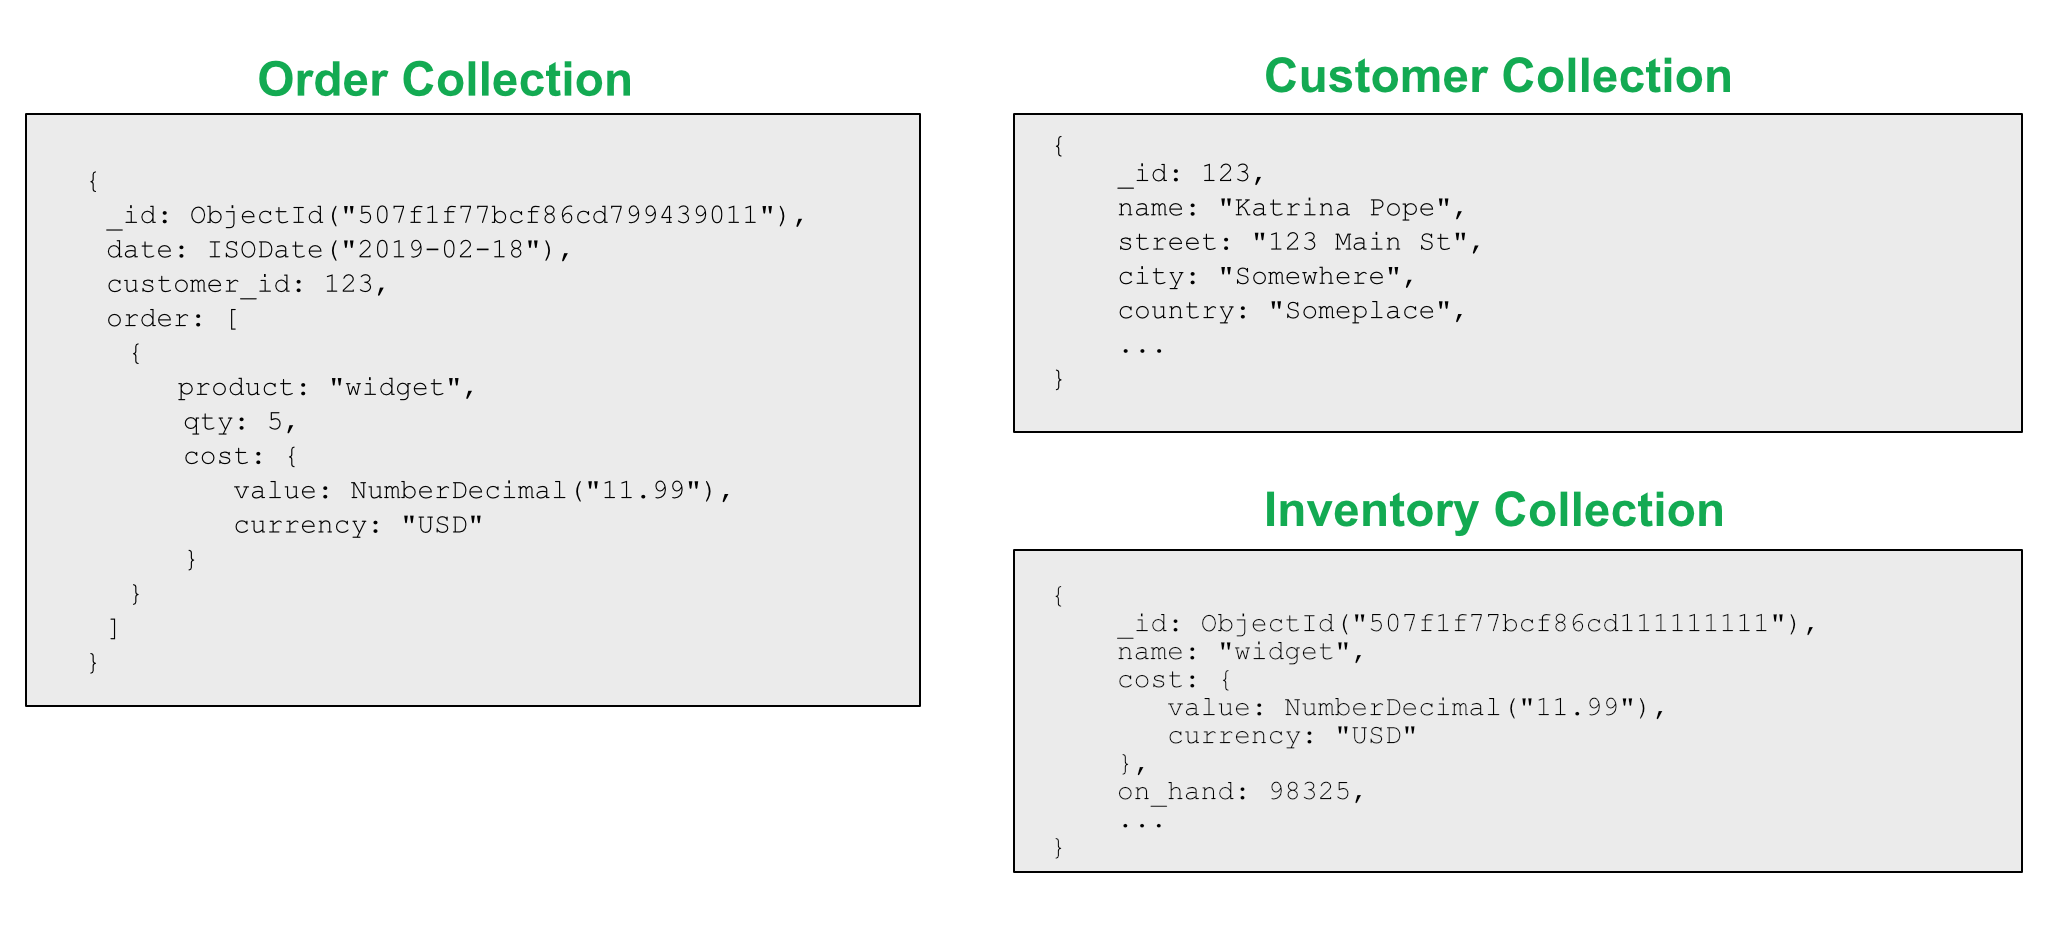
There are times when having separate collections for data make sense. If an entity can be thought of as a separate “thing”, it often makes sense to have a separate collection. For example, in an e-commerce application, the idea of an order exists, as does a customer, and inventory. They are separate logical entities.
From a performance standpoint, however, this becomes problematic as we need to put the pieces of information together for a specific order. One customer can have N orders, creating a 1-N relationship. From an order standpoint, if we flip that around, they have an N-1 relationship with a customer. Embedding all of the information about a customer for each order just to reduce the JOIN operation results in a lot of duplicated information. Additionally, not all of the customer information may be needed for an order.
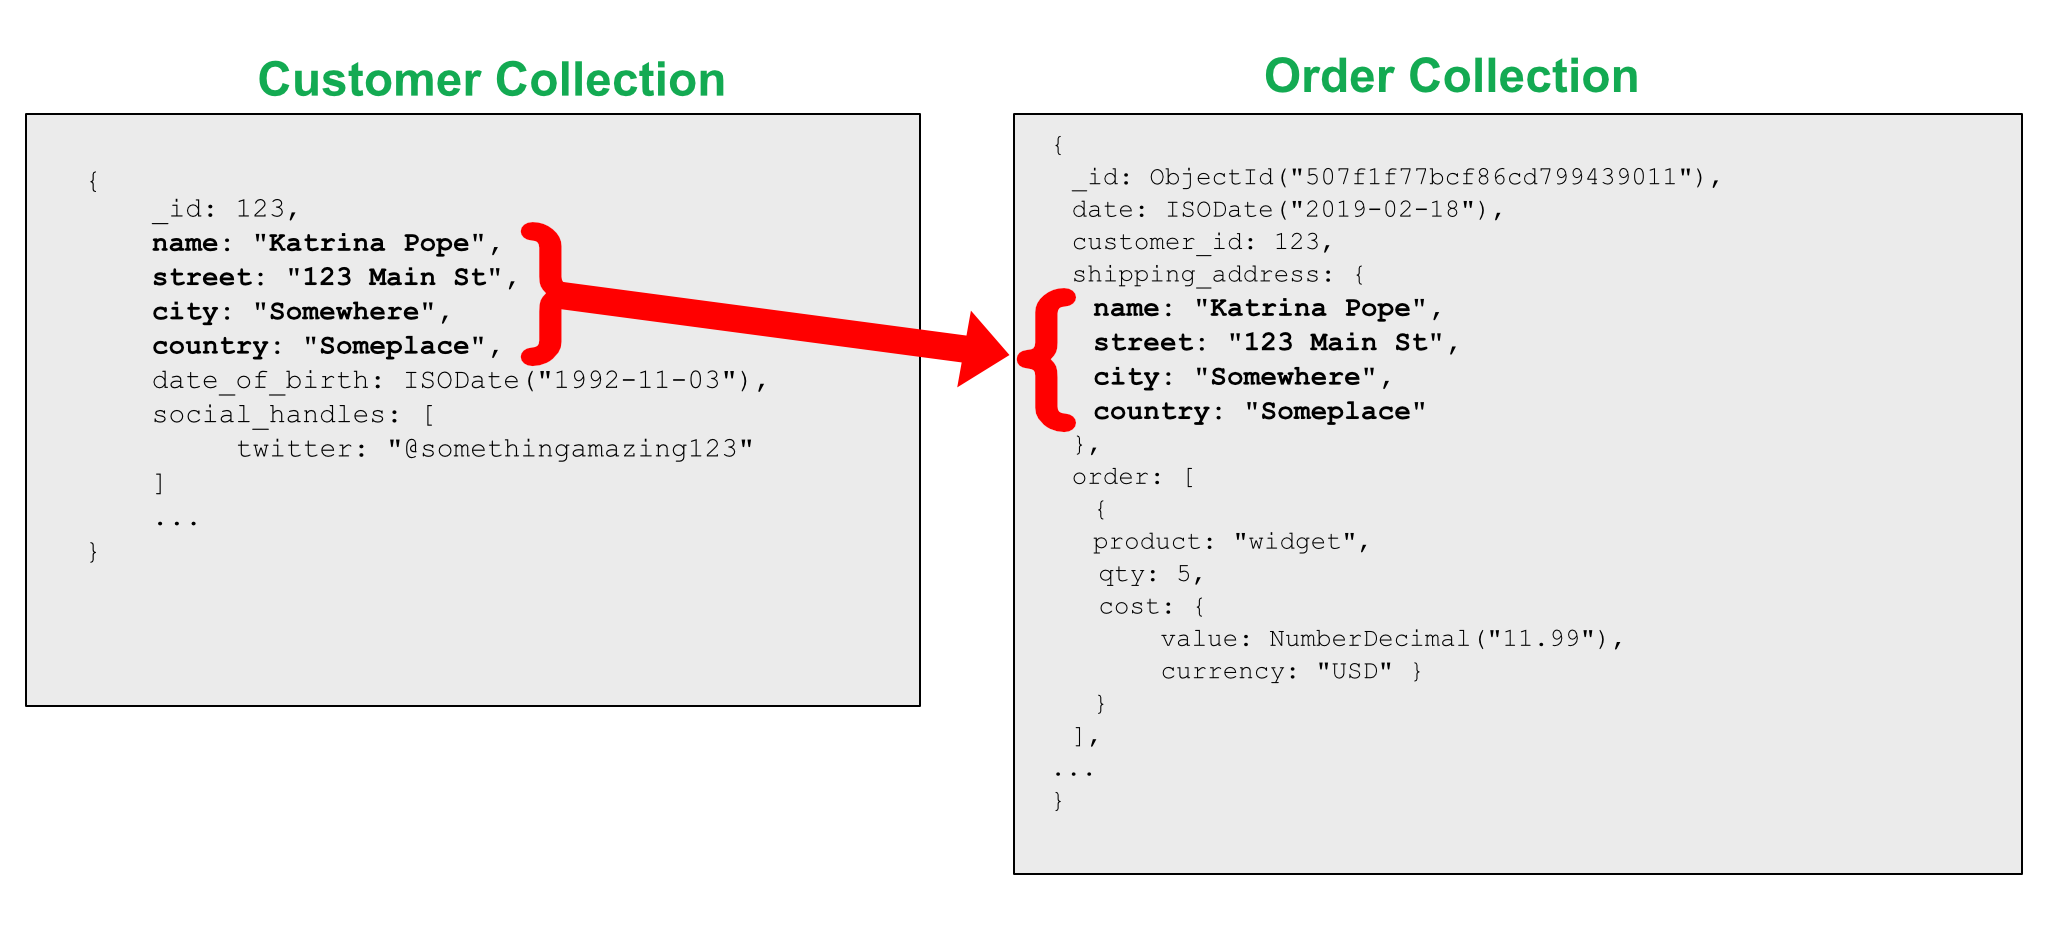
The Extended Reference pattern provides a great way to handle these situations. Instead of duplicating all of the information on the customer, we only copy the fields we access frequently. Instead of embedding all of the information or including a reference to JOIN the information, we only embed those fields of the highest priority and most frequently accessed, such as name and address.
Something to think about when using this pattern is that data is duplicated. Therefore it works best if the data that is stored in the main document are fields that don’t frequently change. Something like a user_id and a person’s name are good options. Those rarely change.
Also, bring in and duplicate only that data that’s needed. Think of an order invoice. If we bring in the customer’s name on an invoice, do we need their secondary phone number and non-shipping address at that point in time? Probably not, therefore we can leave that data out of the invoice collection and reference a customer collection.
When information is updated, we need to think about how to handle that as well. What extended references changed? When should those be updated? If the information is a billing address, do we need to maintain that address for historical purposes, or is it okay to update? Sometimes duplication of data is better because you get to keep the historical values, which may make more sense. The address where our customer lived at the time we ship the products make more sense in the order document, then fetching the current address through the customer collection.
Sample Use Case
An order management application is a classic use case for this pattern. When thinking about N-1 relationships, orders to customers, we want to reduce the joining of information to increase performance. By including a simple reference to the data that would most frequently be JOINed, we save a step in processing.
If we continue with the example of an order management system, on an invoice Acme Co. may be listed as the supplier for an anvil. Having the contact information for Acme Co. probably isn’t super important from an invoice standpoint. That information is better served to reside in a separate supplier collection, for example. In the invoice collection, we’d keep the needed information about the supplier as an extended reference to the supplier information.
Conclusion
The Extended Reference pattern is a wonderful solution when your application is experiencing many repetitive JOIN operations. By identifying fields on the lookup side and bringing those frequently accessed fields into the main document, performance is improved. This is achieved through faster reads and a reduction in the overall number of JOINs. Be aware, however, that data duplication is a side effect of this schema design pattern.
The next post in this series will look at the Approximation Pattern.
If you have questions, please leave comments below.
Previous Parts of Building with Patterns:
- The Polymorphic pattern
- The Attribute pattern
- The Bucket pattern
- The Outlier pattern
- The Computed pattern
- The Subset pattern
This post was originally published on the MongoDB Blog.